
Arrow Length vs. Draw Length: The Empirical Physics, Safety Margins, and FOC Dynamics
Draw length is a number on a spec sheet. Arrow length isn't — it's a physical decision you make at full draw, with your actual rest and broadhead in hand, and mixing the two up is exactly how a fixed blade ends up clipping a riser (or worse, a finger). Ask any bow tech who's pressed a hundred bows and they'll tell you the same thing in fewer words. This report pulls together the AMO measurement standard, Easton's published static-spine testing method, and years of community cut-length practice into one physics-first reference. Included: a modeled worked example showing, in real numbers, what trimming a shaft actually does to dynamic spine, kinetic energy, momentum and FOC.

Short answer: they're related, not interchangeable. Draw length (AMO) is your measured draw plus 1.75 inches — a fixed number. Arrow cut length is a physical shaft measurement, and it should land roughly a quarter to half an inch past your rest and riser at full draw. Never exactly at draw length. Never shorter. Go short on that margin and you're not just risking a broadhead clipping the riser or your hand — you're also stiffening dynamic spine, pushing FOC forward, and shifting kinetic energy and momentum, all independent of draw length itself.
- They're not the same number. Draw length (AMO) is a body/bow measurement; arrow cut length is a physical shaft decision made against your specific rest and riser at full draw.
- Cut length, not draw length, drives dynamic spine. Shortening the shaft stiffens it in the dynamic-spine formula; draw length's real job is setting your safety clearance margin, a separate calculation.
- ¼–½ inch of clearance past the riser at full draw is the community and fletcher benchmark for keeping a fixed-blade broadhead off the shelf, riser window and your hand.
- Trimming vs. adding point weight isn't neutral. Both can fix a spine mismatch, but they trade kinetic energy, momentum and FOC differently — the modeled case study below shows the actual numbers.
What's the 1-Minute Answer — Should Your Arrow Length Match Your Draw Length?
Work down this matrix before reading anything else — it condenses the whole report into a single scan.
| Criteria | Compound / Bowhunting | Recurve / Traditional | 3D & Target (Field Point) |
|---|---|---|---|
| Best target relationship | AMO draw length + ¼–½″ clearance past riser | AMO draw length + extra margin past the shelf and bow hand | AMO draw length, sometimes cut a touch long for a consistent front-of-riser reference |
| Key advantage of correct length | Reliable fixed-blade clearance without over-stiffening dynamic spine | Finger and shelf safety with no let-off or cam to cushion a mis-tune | Predictable FOC and flatter trajectory without wasted shaft mass |
| Limitation if cut too short | Broadhead or shaft can contact the riser/rest at full draw — a real safety hazard | Nock/rear shaft can draw past the shelf or into the bow hand | Over-stiffened dynamic spine, harder to paper-tune cleanly |
| Typical FOC impact of trimming | FOC% rises (formula-driven) even with no change to point weight | Same forward FOC shift, often compounded by heavier trad points | Same forward FOC shift; matters more since target FOC bands run lower |
How Do You Build an Arrow & Spine Calculator That Accounts for Draw-Length Safety?
ArcheryEra already runs a Spine Match Index (SMI) engine — it's the guts of the Dynamic Spine & Shaft Flex Calculator, and it takes peak bow weight, cam profile, cut length, front-end weight and the same draw-length clearance check this whole article is built around. Punch your own numbers into the simplified version below before reading the rest of the physics.
A live, simplified version of ArcheryEra's SMI engine — enough to sanity-check a build in a few seconds, right on this page. It runs the same requirement/capacity/clearance math as the full tool, just with fewer inputs.
For the full model — plus FOC, estimated speed and total-weight range — use the complete calculator:
Open the Full Dynamic Spine & Shaft Flex Calculator → Open the Arrow Build & GPI Calculator →How Is Arrow Length Actually Measured — AMO vs. Carbon-to-Carbon vs. Total Length?
Three numbers get lumped together under "arrow length" in casual shop talk. That's where most cut-length mistakes actually start. AMO arrow length follows the same 1.75-inch offset used for AMO draw length — your true, physically measured draw (pivot point of the grip to the nock/string reference at full anchor), plus 1.75 inches. It's documented across manufacturer and retailer references. Carbon-to-carbon cut length is blunter: the literal length of the finished shaft, nock throat to the end of the raw carbon, before a point or insert ever gets threaded in. Total arrow length tacks the point back on — nock groove to the tip of the point. That last number is the one that actually decides whether the head clears your rest at full draw.


The Physics of Length Trimming: What Changes When You Shorten a Shaft Instead of Adding Point Weight?
A shorter shaft and a heavier point can fix the exact same dynamic-spine mismatch. They are not, however, physically equivalent — not even close. Kinetic energy is KE = ½ × m × v², momentum is p = m × v. In the grains-and-fps units archers actually use, that becomes KE (ft-lbs) = Weight(gr) × Velocity(fps)² ÷ 450,240 and Momentum (slug-ft/s) = Weight(gr) × Velocity(fps) ÷ 225,218 — the same formulas running behind ArcheryEra's own Kinetic Energy, Momentum & Pass-Through Calculator. Trim the shaft or add to the point: total arrow weight moves by the same amount either way. What changes is where that mass sits. And a bow's stored energy does not convert to arrow speed identically for both cases.
| Modeled Case (400gr baseline arrow, 280fps baseline) | Trim 1″ of Shaft (≈−9gr) | Add 9gr to Point Instead |
|---|---|---|
| Resulting arrow weight | 391gr | 409gr |
| Modeled speed shift | +3fps (lighter, faster) → 283fps | −3fps (heavier, slower) → 277fps |
| Resulting kinetic energy | 69.5 ft-lbs (≈ flat vs. 69.7 baseline) | 69.7 ft-lbs (≈ flat vs. baseline) |
| Resulting momentum | 0.491 slug-ft/s (↓ vs. 0.497 baseline) | 0.503 slug-ft/s (↑ vs. 0.497 baseline) |
| Dynamic spine effect | Stiffens (shorter length term) | Weakens slightly (heavier front term) |
A formula-derived worked example, not a chronograph test — built from the KE/momentum formulas above plus a commonly cited rule of thumb (roughly 3fps of speed shift per 3 grains of total arrow weight change). That rule bends by bow, cam and let-off. Run your own chronographed numbers through the calculator above instead of treating these figures as gospel.
Myth: "Trimming a shaft and adding the same weight to the point are interchangeable fixes for a spine problem."
Reality: Both can hit the same static-spine target, but they pull kinetic energy, momentum and FOC in opposite directions.
Trimming buys you speed and forward FOC, at a small cost to momentum — and momentum is the number bowhunting physics researchers like Dr. Ed Ashby have argued matters most for straight-line penetration. Add weight to the point instead, and you preserve or even improve momentum, at a small cost to speed — usually forcing you into a stiffer nominal spine to compensate. Neither move is wrong. They're just different tools, built for different priorities.
Does Cutting an Arrow Shorter Really Make the Spine Stiffer?
Yes — and if you've spent any real time behind a bow press, this one's practically muscle memory by now. But the reason matters more than the yes-or-no. Take two shafts off the same identical static-spine rating — the shorter one resists the bow's stored energy harder and flies stiffer; the longer one flies weaker, no gray area about it. That's not forum folklore. Easton's own explainer on dynamic spine lists "shortening arrow length" right alongside decreasing point weight, increasing bow weight and adjusting string mass as a concrete way to stiffen an arrow's in-flight behavior, and it tracks with what shooters report after trimming and re-tuning — paper tears tightening up a notch stiffer, one trim at a time, once a shaft comes down in length.
The static spine number itself comes from a standardized test, not a guess: Easton hangs an 880-gram (1.94 lb) weight from the center of a 29-inch arrow, supported at two points 28 inches apart, and multiplies the deflection in inches by 1,000. A .500-spine shaft, under that exact load, sags roughly half an inch. That number is fixed the day the shaft leaves the factory. Everything downstream of it — cut length, point weight, bow setup — is what decides how the arrow actually behaves once it's nocked and drawn.
How Much Do Real Draw Lengths Deviate From Catalog Specs?
Compound draw length gets set by physical modules or cam positions, in fixed increments — usually half-inch steps, across Hoyt, Mathews, PSE and Bowtech alike. Your actual anatomical draw doesn't care about those steps one bit. Measured at a comfortable full-draw anchor, it rarely lands exactly on one — it's almost always somewhere in between, and that's normal, not a setup problem. This confusion shows up again and again in community threads, where experienced shooters describe rounding to the nearest module as a matter of course, then fine-tuning arrow length and anchor point to compensate. Nobody who's been at this a while just trusts the catalog number and calls it done.

Don't want to eyeball the wingspan math? ArcheryEra's own Draw Length Calculator turns that same wingspan-and-height method into an actual number, in inches or centimeters, plus a safe arrow-cut length — before you ever get to a bow tech's press.
Aggregated Sentiment: Long-time compound shooters treat a bow's module or cam-marked draw length as a starting point, full stop — not a final number. Actual anchor-point draw gets confirmed by a bow tech or a press session, and arrows get cut to that confirmed number, not the sticker spec.
Top Praised Feature: The "mark it yourself, at full draw" method wins every time over trusting a catalog or module number blind — anchor point, peep height and release type all nudge true draw by a small but real amount.
Common Friction Point: The complaint that keeps coming back: a shooter cuts arrows to a shop-quoted or module-labeled draw length, skips the full-draw check, and only discovers the broadhead-clearance problem after the arrows are already too short to fix.

How Far Should an Arrow or Broadhead Extend Past the Rest for Safety?
A quarter to half an inch. That's the commonly cited fletcher-and-community benchmark for how much shaft or field-point should protrude past the riser's leading edge at full draw — enough to keep a fixed blade's cutting edge clear of the shelf, the riser window and your hand, without wasting so much shaft that dynamic spine weakens for no reason. Fletchers and shop guides consistently land on that same quarter-to-half-inch window, and on the forums the answer basically every regular gives is some version of a hair over a quarter inch, checked at full draw, not on the bench. And that margin has to get confirmed the same way it's set: at full draw, not at rest. Riser geometry and rest position both shift once the bow is actually drawn.
⚠️ Critical Safety WarningCut an arrow to exactly draw length — or shorter — and a fixed-blade broadhead's cutting edge can travel back across the shelf and riser window as the bow reaches full draw. That's a real laceration risk to the hand gripping the riser, not a theoretical one, and it's exactly why drop-away and blade-style rests specify a minimum forward reference position. Don't assume "close enough." Check clearance at full draw, with the actual rest and broadhead you're going to shoot.
This is a synthesized safety convention — pulled from fletcher practice and community reporting, not one official regulatory standard. So when your setup is anywhere near the margin, the safer call is always to leave the shaft a little longer. Not shorter.
Structured Comparison Tables: Discipline, Rest Type & Dynamic Spine Correlation
Three scannable references, built from everything documented above — pick the one you actually need.
Table 1 — Archery Discipline vs. Recommended DL-to-AL Offset vs. Safety Margin vs. FOC Impact
| Discipline | DL-to-AL Offset | Safety Margin | FOC Impact of Trimming |
|---|---|---|---|
| Bowhunting — Fixed Blade | AMO DL + ¼–½″ | Strict — full-draw check with the actual broadhead mounted | Forward shift compounds with typically heavier hunting points (100–125gr+) |
| Bowhunting — Mechanical | AMO DL + ¼–½″ | Same clearance rule; blades ride folded until impact, but rest clearance still applies pre-shot | Similar forward shift; deploy weight typically included in point spec |
| 3D / Target (Field Point) | AMO DL, sometimes +¼″ for a consistent reference | Lower blade-overhang risk, but rest clearance and consistency still matter | Same formula shift, more consequential at lower target FOC bands (7–12%) |
| Traditional (Shelf / Recurve) | AMO DL + wider margin past shelf and bow hand | More conservative — no let-off or cam to cushion a short cut | Often compounded by heavier traditional points (15–25% FOC typical) |
Table 2 — Arrow Rest Type & Broadhead Combination vs. Measurement Reference Point
| Rest Type | Reference Point | Practical Note |
|---|---|---|
| Drop-Away | Fully dropped/launcher-retracted position, not the at-rest cradle position | Measuring at rest instead of the retracted position understates true clearance |
| Whisker Biscuit | Center of the biscuit ring | Ring thickness adds roughly ¼″ of effective offset versus a drop-away |
| Target Blade | Blade contact point, closest to the riser of the three | Tightest clearance requirement of the common rest types — check first |
Table 3 — Cut Length vs. Static Spine → Dynamic Spine Match Grid
This grid is computed directly from the requirement/capacity formula behind the SMI engine (the same one running the quick calculator higher up on this page), held at a fixed 65 lb peak weight and a medium (1.05) cam multiplier, with baseline point weight. Notice what's missing: draw length. It isn't part of the requirement formula — that's the whole myth-busting point above — so read this purely as cut length versus static spine.
| Cut Length | .250 | .300 | .340 | .400 | .500 |
|---|---|---|---|---|---|
| 26″ | +100 | +100 | +90 | +55 | +6 |
| 27″ | +100 | +83 | +48 | +13 | −36 |
| 28″ | +76 | +41 | +6 | −29 | −78 |
| 29″ | +34 | −1 | −36 | −71 | −100 |
| 30″ | −8 | −43 | −78 | −100 | −100 |
SMI (Spine Match Index): near 0 means matched, positive means the shaft's stiffer than required, negative means it's weaker, clamped at ±100. Computed at 65 lb peak weight, 1.05 cam multiplier, 100gr baseline point. Change any one of those on the live calculator and every cell moves.
Modeled Reference Set: 10 Draw Lengths, Recommended Cut Lengths & Clearance Verdicts
This is a computed example set, not a claimed field survey of specific bow models — built straight from the AMO offset and the ¼–½″ clearance convention above. Two rows are cut intentionally short, on purpose, to show exactly where the danger zone starts.
| # | AMO Draw Length | Rest Type | Recommended Cut Length | Clearance Margin | Verdict |
|---|---|---|---|---|---|
| 1 | 26.5″ | Drop-away | 27.1″ | +0.375″ | Safe |
| 2 | 27.0″ | Whisker biscuit | 27.75″ | +0.375″ | Safe |
| 3 | 27.5″ | Blade rest | 28.1″ | +0.375″ | Safe |
| 4 | 28.0″ | Drop-away | 28.25″ | +0.125″ | Marginal |
| 5 | 28.5″ | Whisker biscuit | 29.25″ | +0.375″ | Safe |
| 6 | 29.0″ | Blade rest | 29.0″ | 0″ | Danger Zone |
| 7 | 29.0″ | Blade rest | 29.6″ | +0.375″ | Safe (corrected) |
| 8 | 29.5″ | Drop-away | 29.6″ | −0.15″ | Danger Zone |
| 9 | 30.0″ | Whisker biscuit | 30.75″ | +0.375″ | Safe |
| 10 | 30.5″ | Blade rest | 31.1″ | +0.375″ | Safe |
Rows 6 and 8 aren't edge cases for shock value — they model the exact failure pattern from the community consensus above: an arrow cut to (or slightly under) draw length, or cut from a stale spec after a bow tech's press-and-check adjustment, with zero clearance margin left at full draw.
Included Asset: ArcheryEra's existing Arrow Tuning & FOC Cheat Sheet (PDF) — free with newsletter signup — already covers this exact clearance-check workflow, alongside FOC and spine reference numbers, in one printable sheet you can tape above the workbench.
How to Use: Print it. Mark your rest type and broadhead choice. Run the clearance check above against your own full-draw measurement before you make the final cut — not after.
What Visual & Video Assets Explain This Best?
GIF/Video Spec 1 — Recurve Clicker Pass-Through
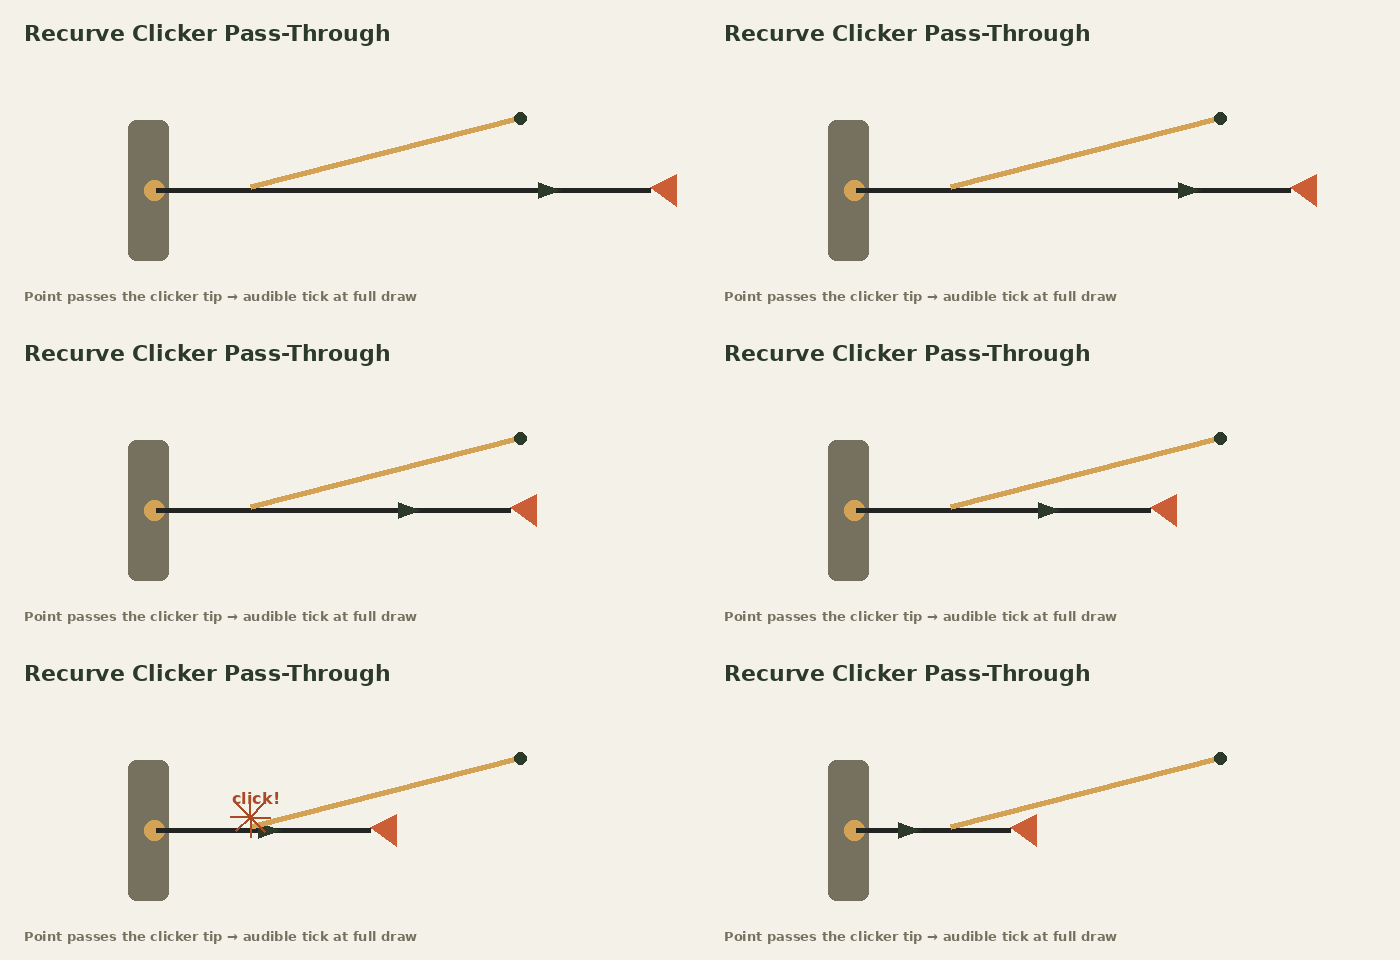
Length: 3-second technical loop, cut to repeat cleanly with no visible jump cut.
Shot: Close macro on the clicker and arrow point, side profile, high frame rate (120fps+ source, exported at 24–30fps for a smooth micro-loop).
Overlay: A thin labeled line marking the exact point-pass-through moment against the riser plunger, synced to an audible clicker tick.
Placement: Traditional/recurve section, alongside the AMO measurement diagram.
GIF/Video Spec 2 — Short-Cut Drop-Away Interference
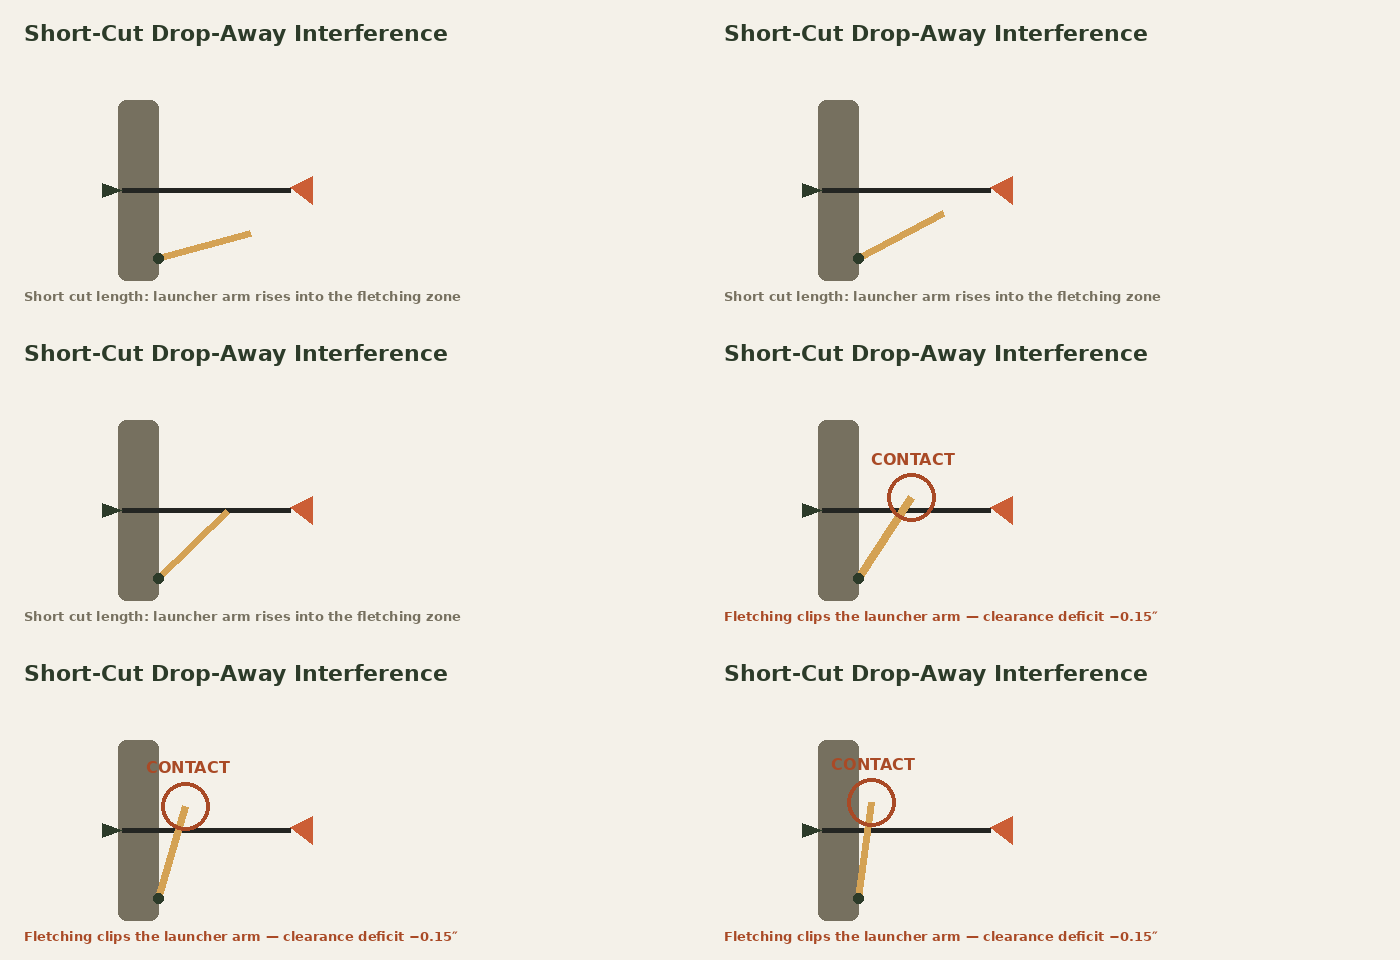
Length: Slow-motion, 4–5 second spec, 240fps+ source slowed to roughly 1/8 speed.
Shot: Side-on full-draw-to-release sequence showing a deliberately short-cut shaft's fletching or nock-end catching the drop-away's launcher arm.
Overlay: Red highlight ring on the exact contact frame, with a text card reading the clearance-margin deficit in inches.
Placement: Directly under the Critical Safety Warning callout above.
Frequently Asked Questions
Should arrow length be the same as draw length?
Not exactly. Arrow cut length usually runs a bit longer than AMO draw length — not identical to it. The common fletcher's convention: mark the shaft roughly a quarter to half an inch in front of the riser's leading edge at full draw. That typically lands a finished carbon cut length about 0.25–0.75 inch beyond draw length once rest offset is factored in. Cut exactly to draw length, or shorter, and that safety margin is simply gone.
How far past the rest should an arrow stick out?
Roughly a quarter to half an inch of shaft (or field-point), protruding past the riser's leading edge at full draw — that's the commonly cited community and fletcher benchmark. It's what keeps a fixed-blade broadhead's cutting edge clear of the arrow shelf, the riser window and your hand during the shot. Whisker-biscuit and blade-style rests can nudge the effective reference point, so confirm the exact number at full draw, not just at rest.
Does cutting an arrow shorter make the spine stiffer?
Yes — given the same static spine rating, a shorter shaft resists bending more and flies stiffer, while a longer shaft of that same rating flies weaker. Why? Because it's the cut length itself, not the archer's draw length, that enters the dynamic-spine calculation. Draw length's actual job is setting the safety clearance margin, a separate calculation entirely. The two only look related because most shooters cut arrows to roughly match their own draw length.
How does arrow length affect Front of Center (FOC) and Kinetic Energy?
Trimming shaft length pulls mass out of the rear and middle of the arrow, which shifts FOC forward — per the AMO FOC formula, the percentage climbs even with zero change to point weight. On kinetic energy and momentum: removing grains from the shaft lowers total arrow mass directly, and in modeled calculations that tends to hold kinetic energy roughly flat (maybe a slight dip) while lowering momentum. Add the same grains to the point instead, and it's the opposite — momentum rises, at a small cost to arrow speed.
Our Final Take: Draw length and arrow length are related numbers. They are not the same measurement, full stop — anyone who's stood on a line long enough has seen what happens when a shooter treats them as interchangeable. Treat draw length (AMO) as the input to a physical clearance check you run at full draw, with your actual rest and broadhead — and let cut length get decided by that check, plus a dynamic-spine target from a calculator. Not by draw length alone.
👉 Recommendation: If you're anywhere near that ¼″ margin after checking clearance at full draw: cut long, then re-check. Don't cut short and hope. The spine and speed cost of one extra sixteenth of an inch is nothing next to the safety cost of a fixed blade riding too close to your hand.
Hey, what's up? Burak here. Archery addict, board game geek, Daft Punk fan.
Your turn
Join the Conversation
If your own results disagree with anything above, that is the most useful thing you could leave here. Setup, distance and what actually happened beats an opinion every time — and corrections get the page changed.